ImgUU: Building a Free Image Hosting Service with Cloudflare R2
Prerequisites
- Cloudflare account
- A domain name already resolved to Cloudflare
Creating a Bucket and Obtaining Token Parameters
Log in to Cloudflare and click on the R2 Object Storage menu in the sidebar.
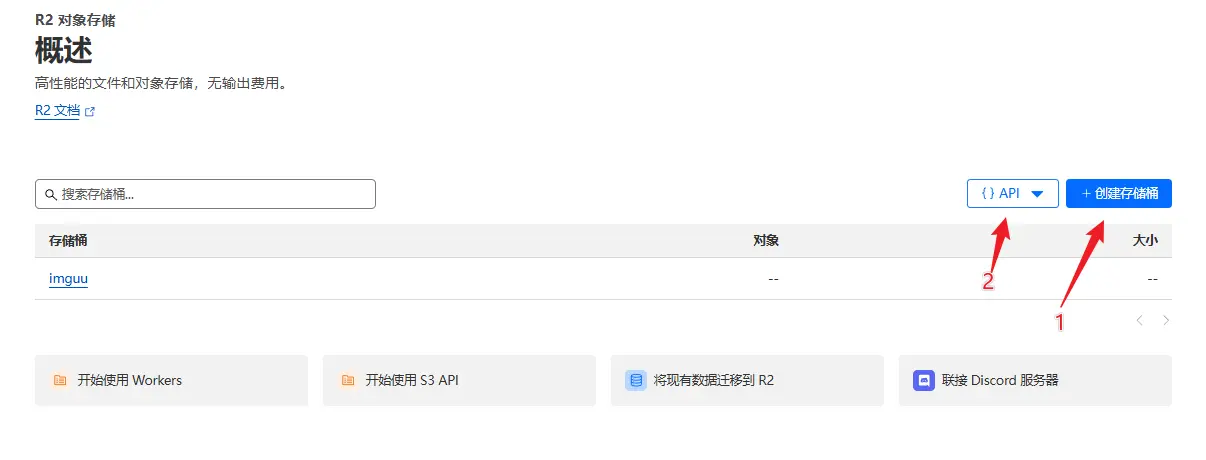
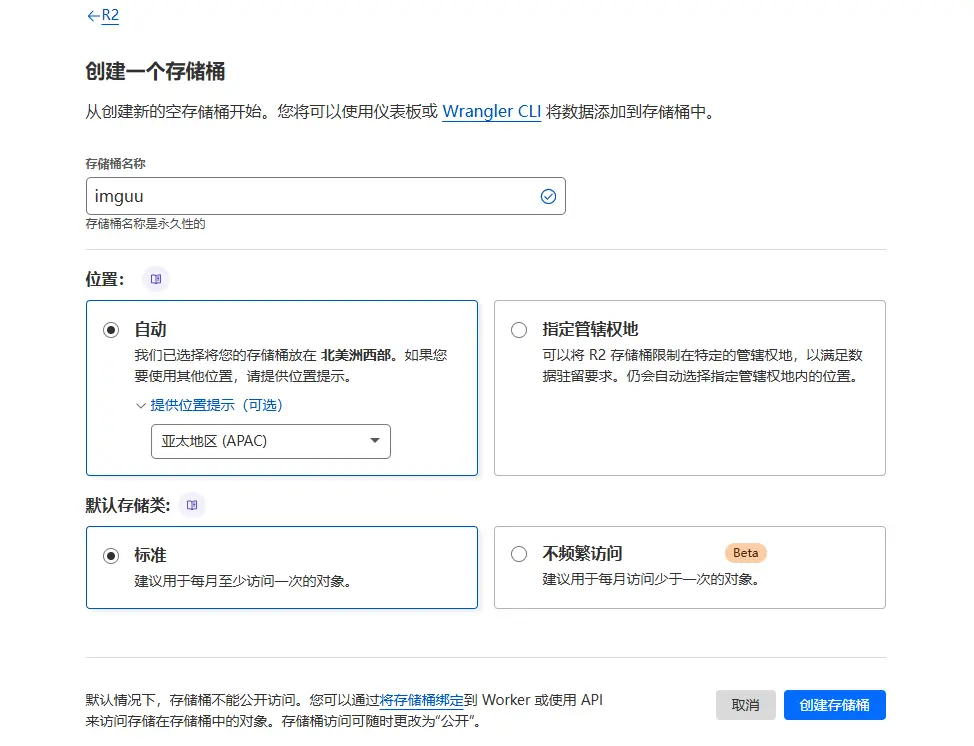
First, create a bucket named imguu (this name will be used in the configuration). You can set the location based on the region where your website’s audience is located. Choose the standard storage class by default.
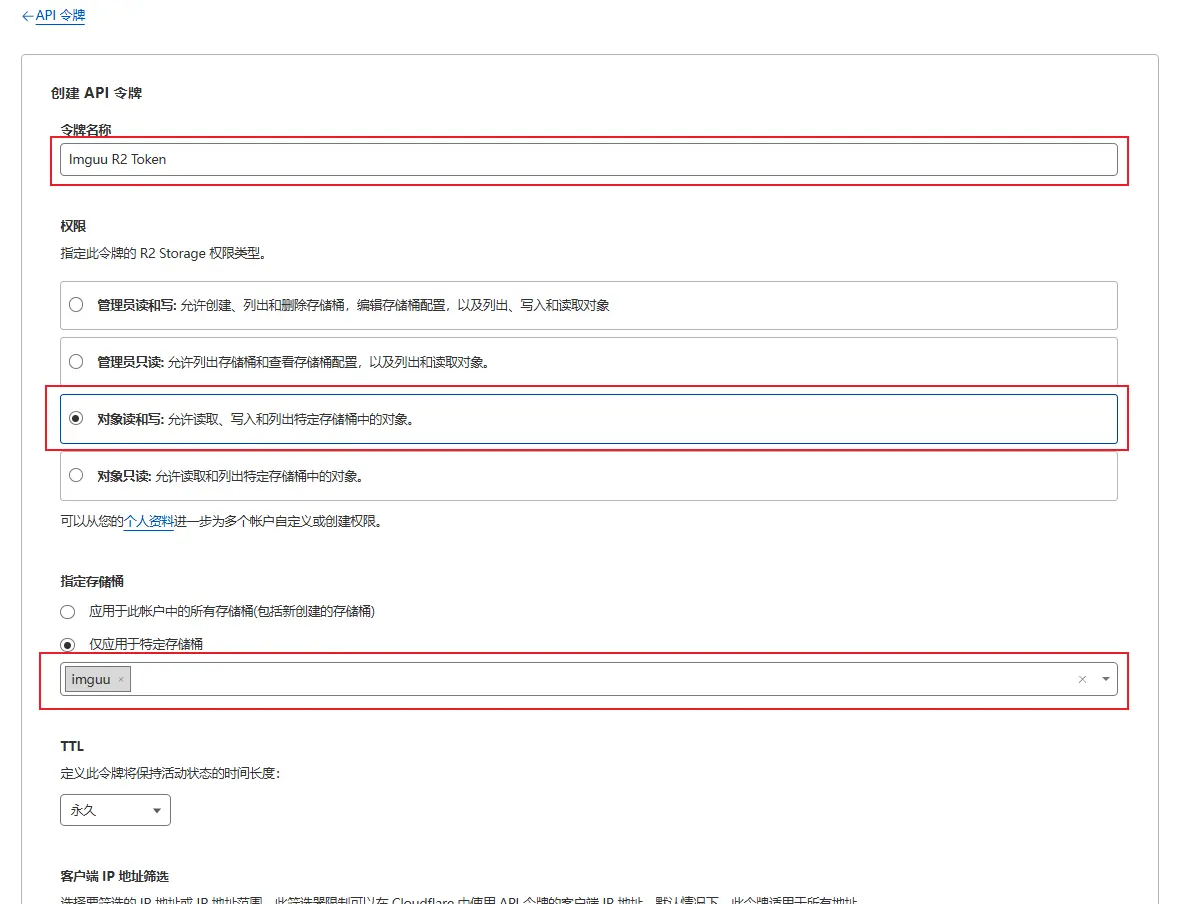
Then, create an API Token with any name, specify the bucket, and set the TTL to permanent by default.
After clicking “Done”, you will get the bucket configuration parameters: accessKeyId, secretAccessKey, and accountId.
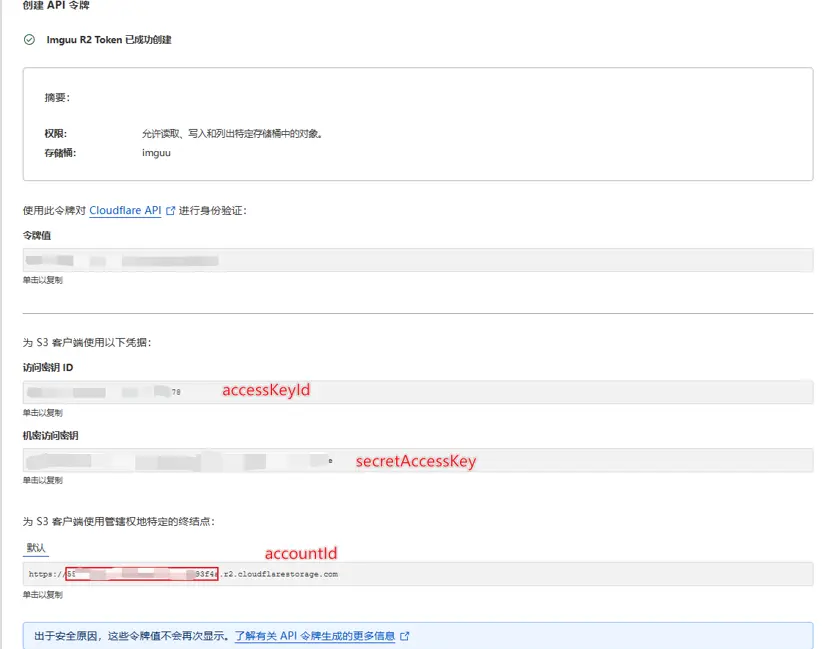
Token creation complete.

Associating a Domain with the Bucket
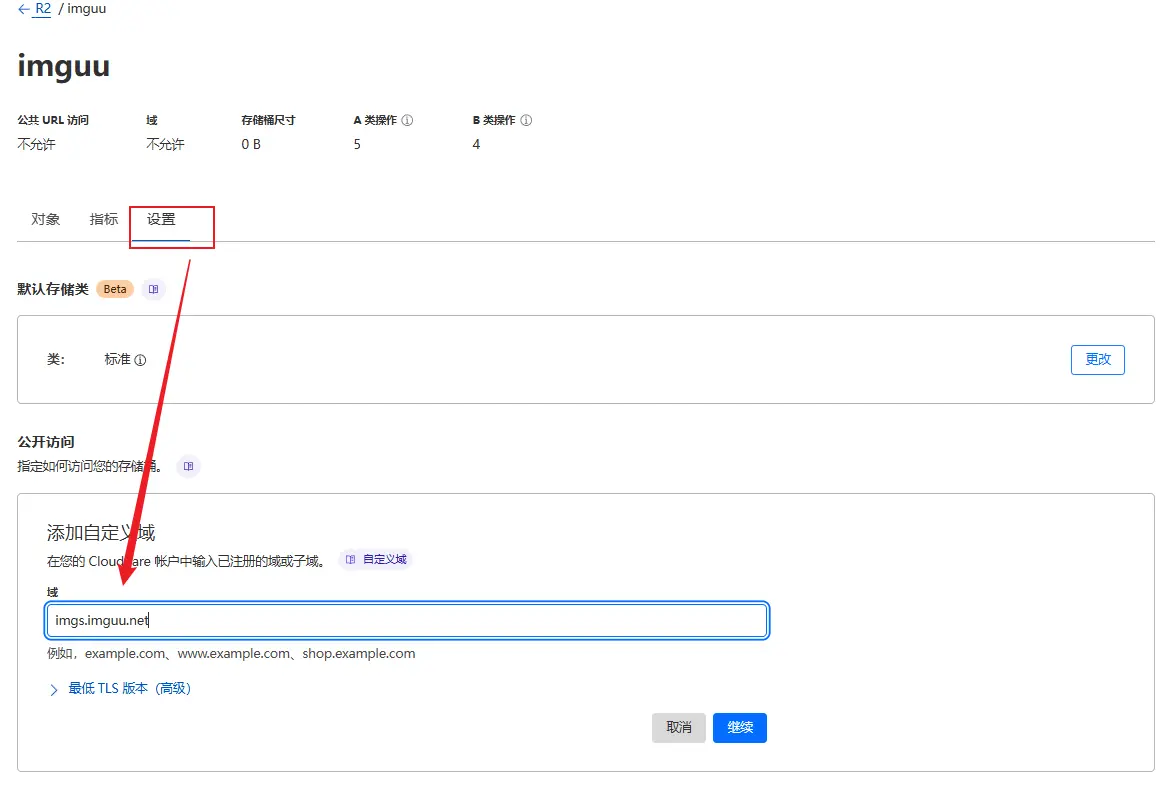
Click on the imguu bucket, click the “Settings” tab, and enter a domain name hosted in Cloudflare (either the main domain or a subdomain) in the custom domain field. Click “Continue”.
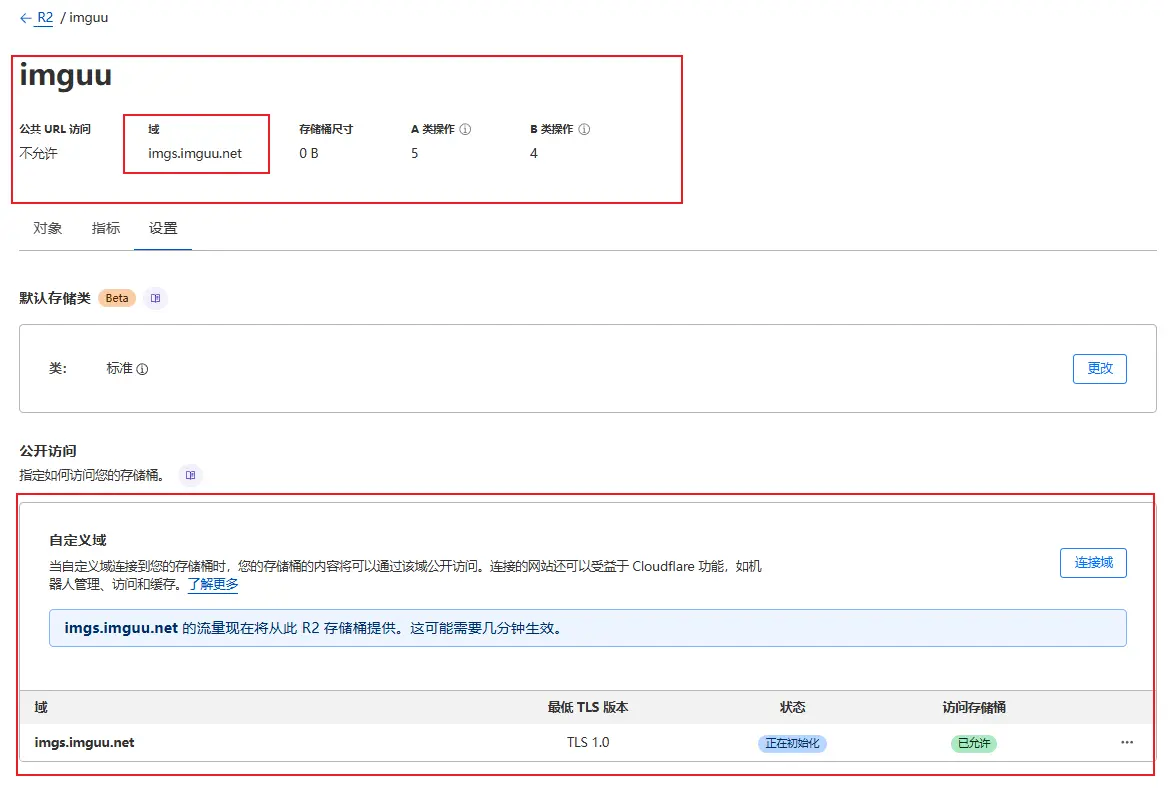
Preview the association between the bucket and the domain. If everything is correct, click Connect Domain.

Domain and bucket association successful. Wait for DNS to take effect, which usually takes a few minutes.
Logging into the Backend and Setting Storage Configuration and Upload Website
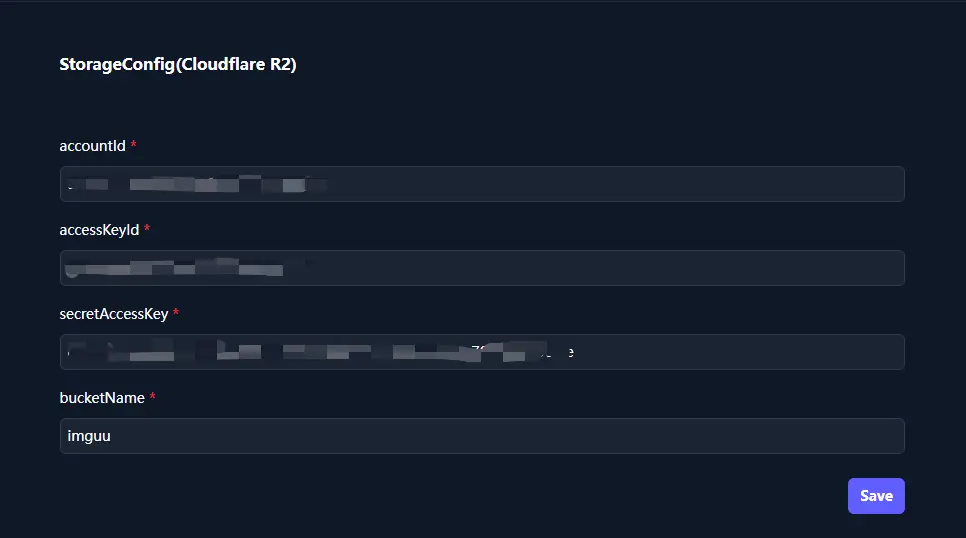
Log in to ImgUU with GitHub and set the bucket-related information.
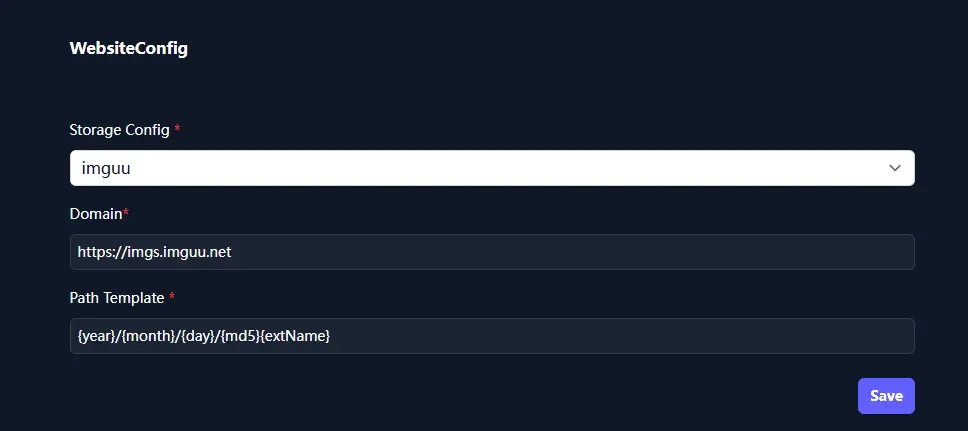
Set the upload website and path template.
Upload Test
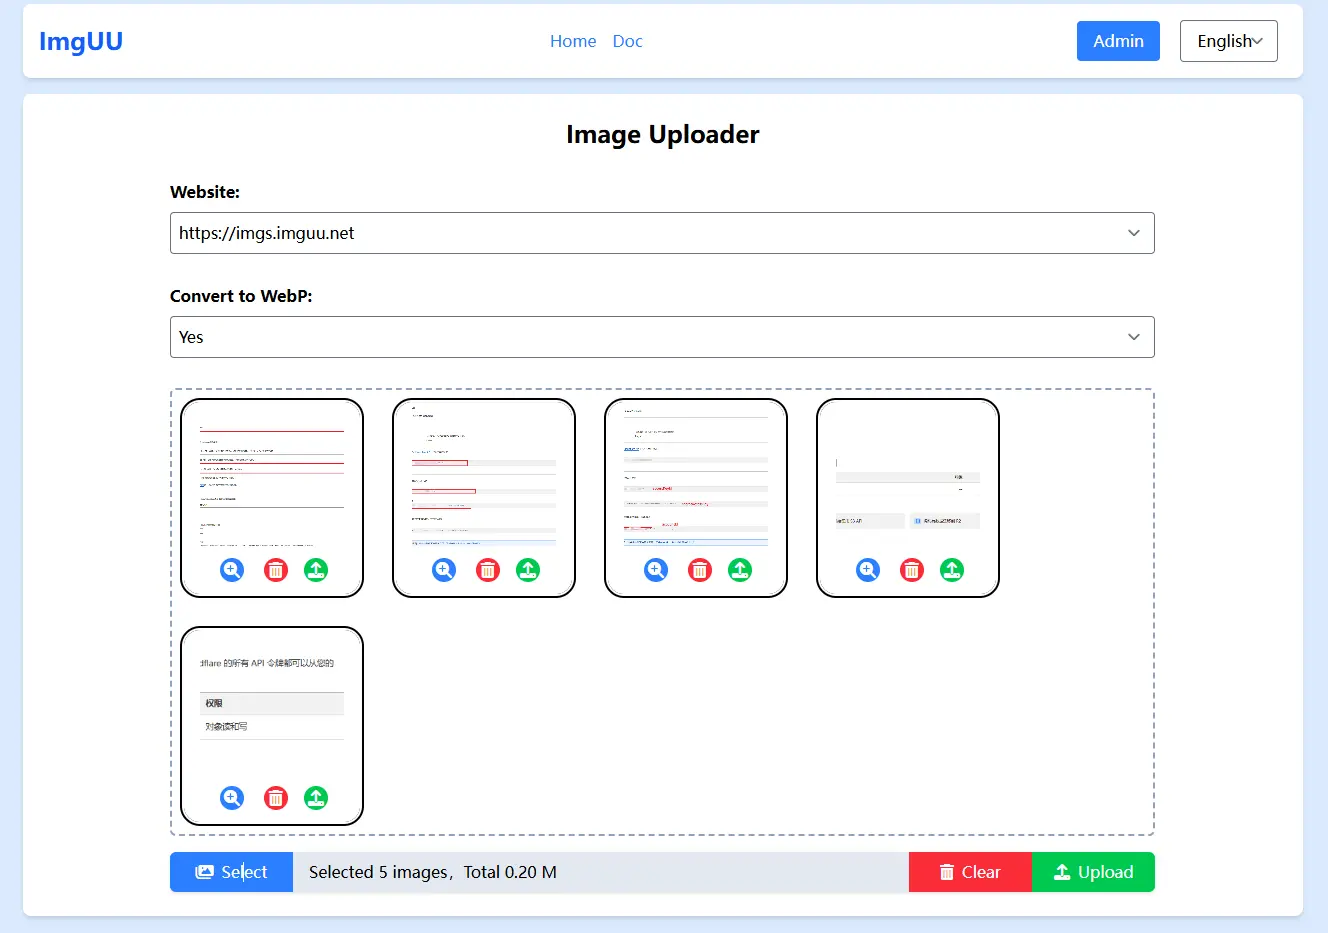
Select the upload site, drag and drop or copy and paste the image into the upload window, and click “Upload”.
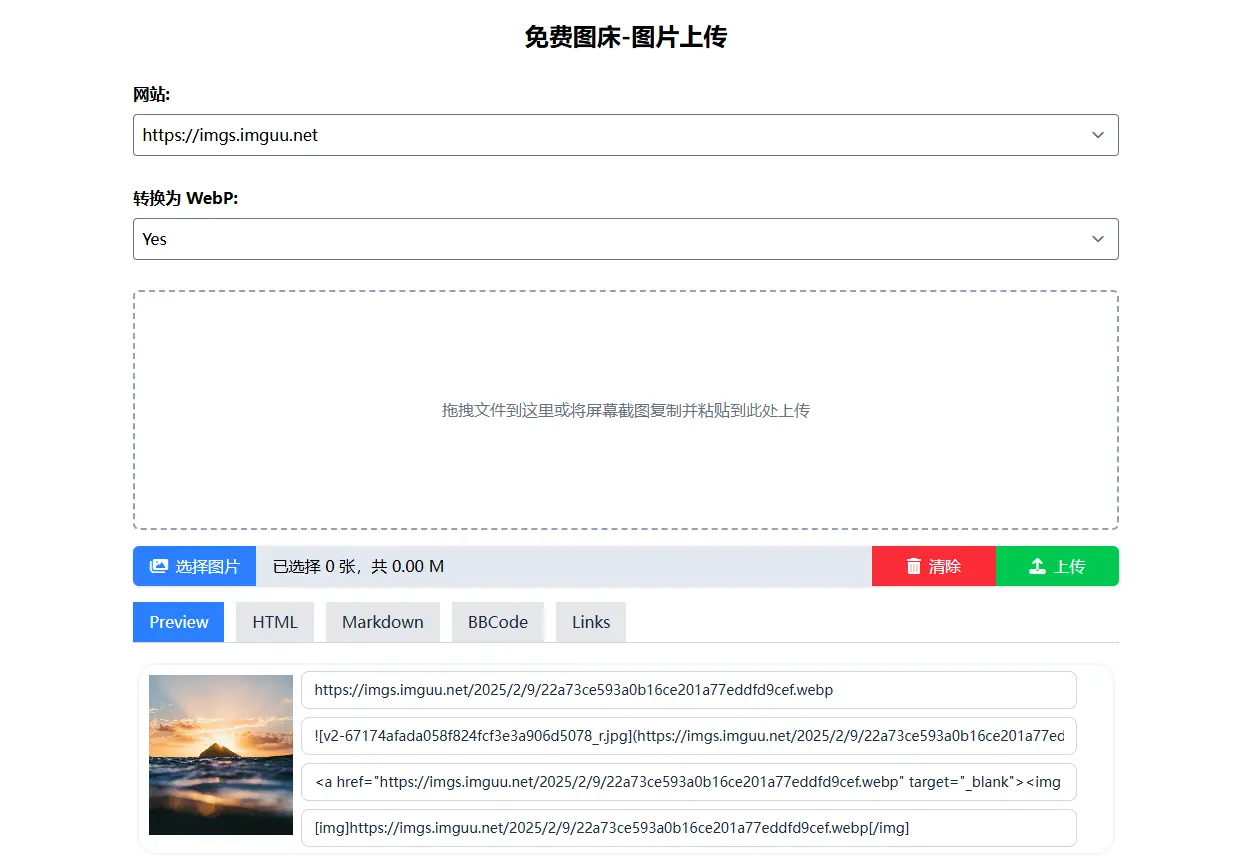
After uploading, commonly used URL information will be displayed below for easy writing and referencing.
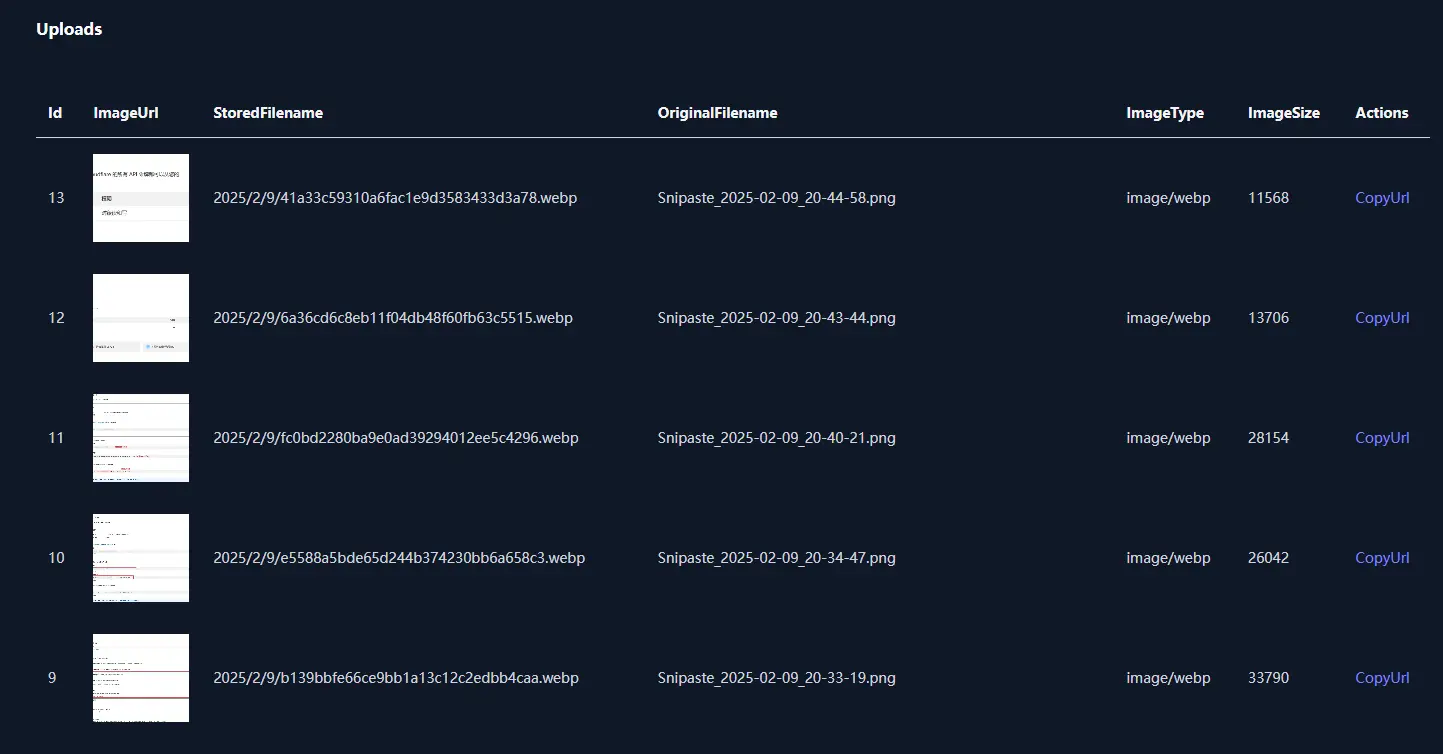
Viewing Upload History in the Backend
You can view the upload history in the backend.
Open Source
At the same time, this is an open-source project: https://github.com/yestool/imgUU
however, the open-source version does not support multiple storage buckets, multiple sites, or the conversion of uploaded images to WebP format.